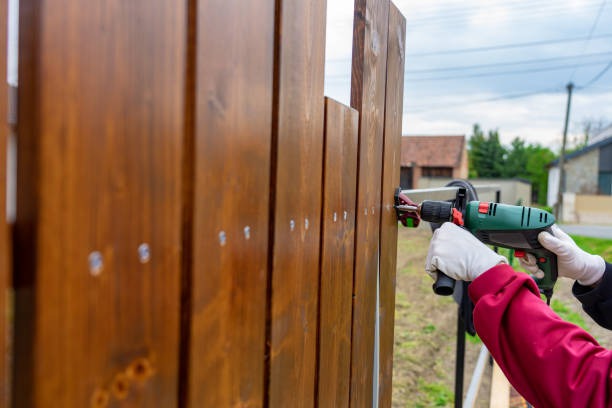
Deciding to install a fence around your property is a significant investment. Besides providing privacy, it can enhance the aesthetics and value of your home. But what should you expect during the fence installation process? Here is a step-by-step guide to give you a clear picture of what lies ahead.
1. Initial Consultation and Site Survey
The first step in the fence installation process is the initial consultation and site survey. During this stage, a representative from the fence installation company will visit your property to assess the area where the fence will be installed. They will measure the perimeter, evaluate the terrain, and discuss your specific needs and preferences.
Be prepared to talk about:
-
Desired fence style and material
-
Purpose of the fence (privacy, security, decoration)
-
Budget constraints
-
Timeline for completion
2. Choosing the Right Fence Material
Once the site survey is completed and your needs are understood, you will need to choose the right fence material. Common options include wood, vinyl, aluminum, and chain-link. Each material has its pros and cons, so take some time to consider which one best suits your needs.
Wood Fences
Wood fences offer a classic appearance and can be customized with paint or stain. However, they require regular maintenance to prevent rotting and weathering.
Vinyl Fences
Vinyl fences are low-maintenance and durable, making them an attractive option for many homeowners. They come in a variety of styles and colors, so you can easily match them to your home’s exterior.
3. Permits and Regulations
Before any ground is broken, it’s essential to check local regulations regarding fence installation. Some areas may have specific rules about height, materials, or placement. You may also need to obtain a permit. Your fence installation company can help you navigate this process, but be prepared to do some groundwork to ensure compliance.
4. Preparing the Site
Once all the necessary permits are in place, the next step is site preparation. This involves marking the fence line and clearing any obstacles, such as trees, rocks, or old fencing.
Here’s what to expect during site preparation:
-
Marking the fence line accurately using stakes and string
-
Clearing the area of debris and obstacles
-
Ensuring the ground is level
-
Locating underground utilities to avoid damage during digging
5. Delivering Materials
The materials for your fence will be delivered to your property before installation begins. Make sure there is a designated space to store the materials safely until the installation day.
6. Installation Day
The big day has arrived. Here’s a step-by-step breakdown of what happens during the actual installation:
Digging Post Holes
The first step is to dig holes for the fence posts. The depth and width of the holes will vary depending on the type of fence and soil conditions.
Setting the Posts
Once the holes are dug, the fence posts are set in place. They are typically secured with concrete to ensure stability. The posts must be leveled and aligned correctly.
Installing Rails and Panels
After the posts are secure, the next step is to install the rails and panels. This part of the process varies depending on the type of fence. For instance, wood fences are constructed differently compared to vinyl or chain-link fences.
Attaching the Gates
If your fence includes gates, they will be installed last. Gates must be properly aligned and swinging freely without obstruction.
7. Post-Installation Cleanup
Once the installation is done, the crew will clean up the site. This includes removing any debris, leftover materials, and tools from the area. Before the team leaves, ensure that the finished job meets your expectations.
8. Final Inspection and Walkthrough
The final inspection and walkthrough are crucial to ensure everything is done to your satisfaction. Here’s what you’ll typically review:
-
Alignment and stability of the fence
-
Adequate spacing of panels and posts
-
Smooth operation of gates
-
Overall appearance and quality of workmanship
Don’t hesitate to ask questions or express any concerns during this walkthrough. Your feedback is essential for completing the project successfully.
Maintenance Tips
Even the most durable fences require some level of maintenance to stay in optimal condition. Here are a few tips to help you maintain your fence:
-
Regularly inspect for damage or wear
-
Clean off dirt and debris
-
For wooden fences, apply a sealant or stain periodically
-
Check for loose or damaged parts and repair them promptly
If you have a vinyl fence installation in Utah, for instance, you must periodically clean it with water and a mild detergent to remove dirt and grime. This will keep your fence looking new for years to come.
Choosing the Right Installer
Choosing the right fence installer is just as important as selecting the right materials. Look for contractors who offer professional fence installation in Salt Lake City and have good reviews and reliable references. This ensures that your fence is installed correctly and will stand the test of time.
While it’s tempting to save money by doing it yourself, working with professionals can save you time and potential headaches. Qualified installers have the experience and tools to handle issues that may arise during the process.
Considering Additional Features
If you’re looking to enhance your outdoor living space further, consider additional features such as pergolas and patios. These additions can complement your new fence and provide extra functionality and beauty to your backyard. With a cohesive design, you can create an inviting space perfect for relaxation and entertaining.
Final Thoughts
Installing a fence is a multi-step process that requires careful planning, selecting the right materials, and choosing a reputable installer. By understanding each step, you can set realistic expectations and ensure a smooth and successful project. Once the fence is installed, remember to maintain it properly to keep it looking great and functioning well for years to come.


